
Windows Kernel Exploitation 2 — HEVD Installation
First of all, this was created by a security researcher named Ashfaq Ansari. In particular, it is aimed to learn and improve the researchers who will work at the Kernel level.
In this article, I will try to explain the previous step of driver exploitation as simply as I can.
Note: I created two different VMs on VirtualBox (MacOS version)
Environment Requirements — Debugger VM
- Visual Studio (I installed version 2012)
- Windows 10SDK (WinDbg) (available in my previous posts)
Environment Requirements — Debugee VM
- Visual Studio (I installed the 2015 community version)
- DebugView
- OSR Driver Loader
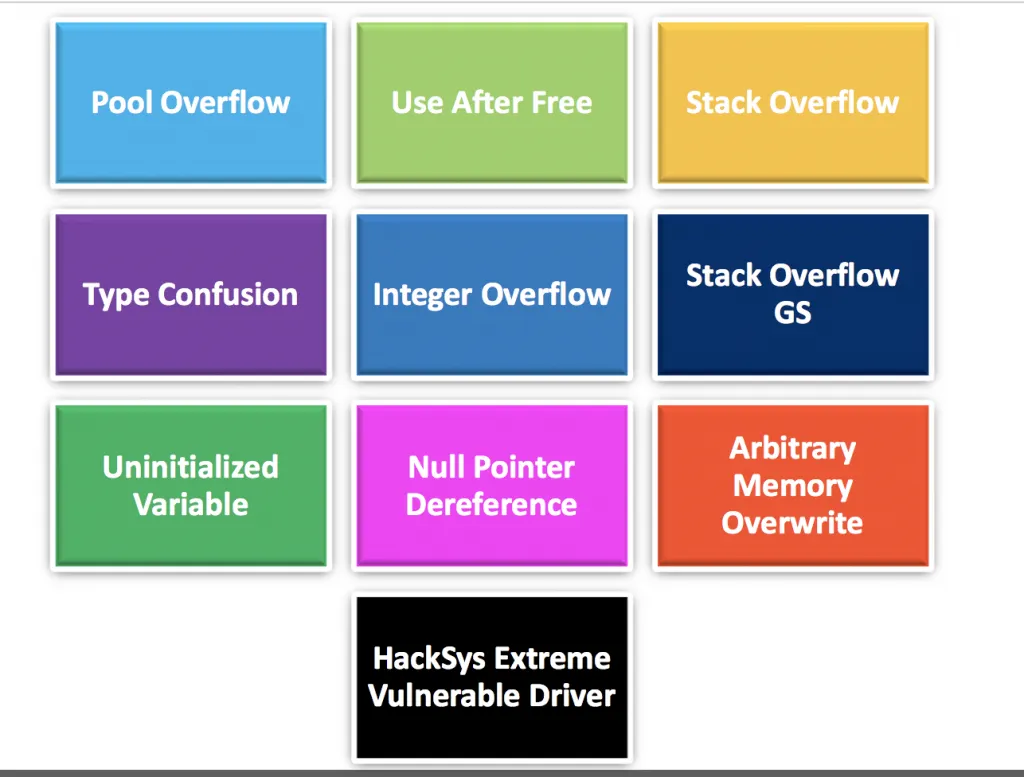
- HackSys Extreme Vulnerable Driver (HEVD) + Source codes
Before starting the second stage, we install the necessary packages above on both of our machines.
HEVD Setup
First of all, this was created by a security researcher named Ashfaq Ansari. In particular, it is aimed to learn and improve the researchers who will work at the Kernel level. When we take a look at the source code, there are more complex vulnerabilities such as Use After Free from Buffer Overflow.
In this section, we will cover how to make adjustments in Debugger VM and Debugee VM while installing HEVD. Activating Debug Strings first, then loading HEVD’s symbols.
Enabling Debug Strings
Debugger VM: First, we run Windbg and establish the connection with the Debugee VM. Then, to receive the KD command, we stop Debugee and activate DebugStrings with the following command:
ed nt!Kd\_DEFAULT\_MASK 8

ed nt!Kd\_IHVDRIVER\_MASK 8
Then we can let Debugee run more with the following command:
gSetting up HEVD Drivers — Debugee VM
After this part, we have come to the HEVD drivers installation part. We can download the relevant packages from the GitHub page. In this section, you can select the part (x864 or x86) that is related to the architectural structure you are interested in. Besides, when you download the files, you will see two different folders named secure/vulnerable.Here we will use the part called vulnerable.
To install these drivers, we will use an application called OSRLoader, the screenshot of which is below. With this application, we will provide the process of installing drivers on the system. We do all of the above operations on the Debugee VM.
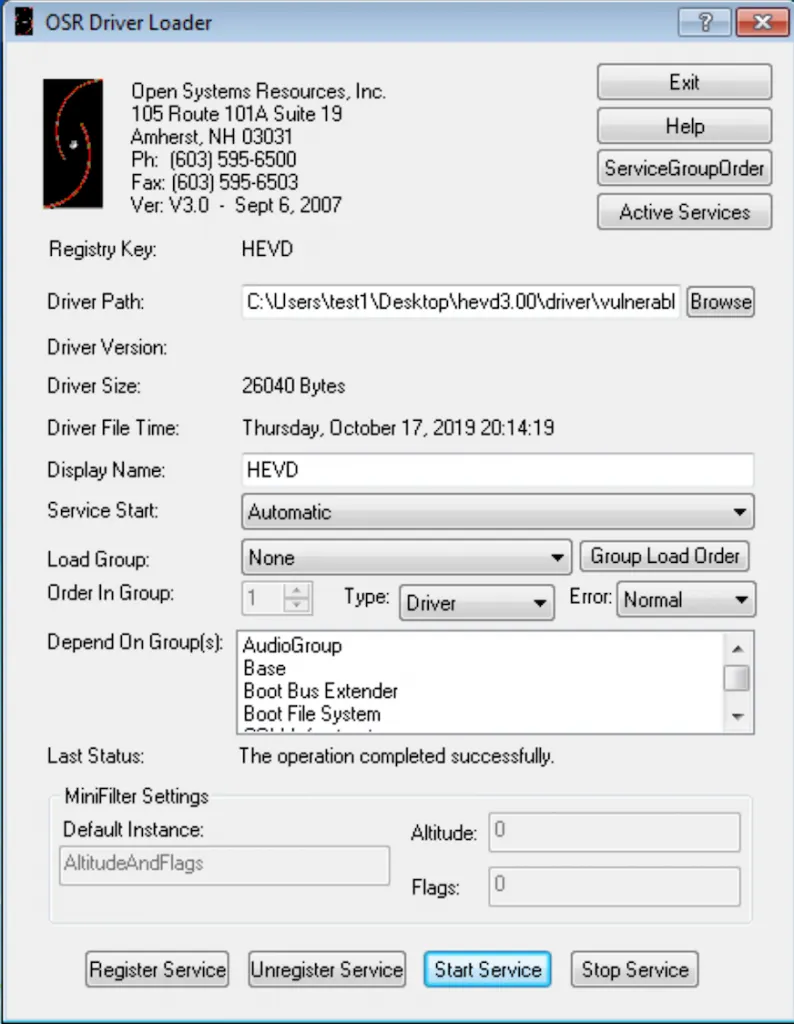
We specify the path of our file named HEVD.sys, which can be exploited from the DriverPath section. We set Service Start*to Automatic. Finally, we click the Register Service and then the Start Service buttons and start it.
I mentioned another application called DebugView, which I mentioned at the beginning of the article. After opening the application with administrator rights, you need to select the Capture Kernel section in the Capturesection. After making all the adjustments, you should get the above image.
Setting up HEVD Drivers — Debugger VM
We’re done with Debugee. In this part, we need to set the symbol file that comes with the HEVD packages in the Debugger VM here. Therefore, we can perform the Break operation and continue our operations here.
There is a file named HEVD in the vulnerable folder of the project file we downloaded from Github. First of all, we copy this file into our Symbol file that we have previously installed for Windbg.
Then, to see which modules are loaded from the Windbg command line:
kd>lmBut, we can use filters to reduce our search process:
kd>lm m HThen, you will see a file named HEVD in the output. After clicking, you will see the above output. You will most likely get an error after clickingBrowse all global symbols.
In the error you get, it will be stated that there is no folder and path related to HEVD symbols. Therefore, we create the folder structure specified in the error and copy the file that we previously copied to the symbols folder here.
After completing this process, we try to reinstall the HEVD driver with the same command kd>lm m H. After everything is done correctly, we should be faced with an output similar to the one above.
Exploit Part
If we want to run the exploits, we first need to build. Therefore, Visual Studio must be installed on your Debugee machine. After building without any problems, you will see that the necessary exe file has been created. Then you can run it via cmd.